Epoxy Flooring & Common Issues

Epoxy Flooring is quickly becoming a popular staple in american homes as the number one flooring solution all around. In this article we will dive into some of the elements of epoxy flooring that most people fail to consider. First let us take you through what an epoxy coating even is.

So What Is Epoxy Flooring?


An epoxy coating is a material that is applied to surfaces in order to protect them from wear and tear, as well as provide a barrier against moisture, chemicals, and other substances. Epoxy coatings are typically made up of two parts: a resin and a hardener. When these two parts are mixed together, they create a tough, durable coating that can adhere to almost any surface.

Epoxy is a complex coating that requires close attention to detail and instructions about the formula to get it to come out right the first time. Are you familiar with epoxy floor coatings? You probably have seen it before without even realizing it. Epoxy floor coatings are commonly used in industrial and commercial settings because of their attractive glossy finish and durability. But what exactly is an epoxy floor coating?

Many of us know that it is a type of floor coating, but do you know what epoxy is made of? In this article, we will take a closer look at the chemical makeup and formula of an epoxy floor coating and common issues you may encounter with epoxy flooring.

Facts about Epoxy

Epoxy floor coatings are made from a mixture of two parts: a resin and a hardener. The resin is usually a liquid that is derived from petroleum, while the hardener is typically a crystalline powder. When these two parts are mixed together, they create a chemical reaction that causes the mixture to harden into a durable, glossy finish. With that said, there are different types of resins and hardeners that can be used to create epoxy floor coatings. The combination of these ingredients will determine the final properties of the epoxy coating. For instance, the ratio of resin to hardener can be adjusted to create a harder or more flexible finish. In addition, different types of fillers can be added to the mixture to create a variety of textures.

The Benefits of Epoxy Floor Coatings

Now that we know a little bit more about what epoxy is let's take a look at some of the benefits of epoxy floor coatings. As we mentioned earlier, one of the biggest advantages of epoxy floor coatings is their durability. This type of flooring is resistant to many chemicals, oils, and other liquids that can damage other types of flooring. In addition, epoxy floor coatings are also very easy to clean and maintain. They are often used in commercial kitchens and industrial settings because they can withstand high traffic and heavy equipment. Another benefit of epoxy floor coatings is that they are slip-resistant. This feature is especially important in wet or oily environments.

Epoxy Floor Coating Installation

If you are interested in installing an epoxy floor coating, it is important to understand the installation process. This type of flooring is typically installed by a professional contractor, but it is possible to do it yourself if you have the proper equipment and training. Here are the basic steps involved in installing an epoxy floor coating:

1. Prepare the surface: The first step is to make sure that the surface is clean and free of any debris. Any cracks or holes should be repaired before the epoxy coating is applied. Cleaning the surface is also important because it will help the epoxy to adhere properly.

2. Mix the epoxy: The next step is to mix the resin and hardener together. It is important to follow the manufacturer's instructions carefully so that the chemical reaction occurs properly. Failing to mix the epoxy properly can result in a poor-quality finish.

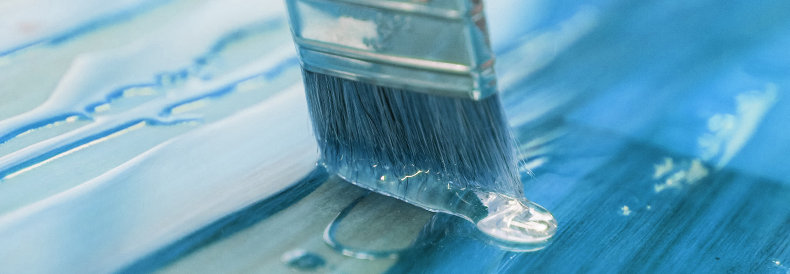
3. Apply the epoxy: Once the epoxy is mixed, it is time to apply it to the surface. This can be done with a brush, roller, or sprayer. The thickness of the coating will depend on the manufacturer's specifications. The epoxy should be allowed to dry for the recommended amount of time before traffic is allowed on the surface.

4. Apply a topcoat: In some cases, a top coat may be applied to protect the epoxy floor coating from UV rays and other elements. This step is not always necessary, but it can extend the life of the coating. Top coatings are typically clear and provide a glossy finish.

If you follow these steps, you should be able to install an epoxy floor coating without any problems. However, it is always best to consult a professional contractor to make sure that the job is done correctly.

Is Epoxy Flooring Expensive?

The cost of epoxy flooring will vary depending on a number of factors. The size of the area to be coated, the type of epoxy used, and the complexity of the installation are all important factors that will affect the price. In general, epoxy flooring is more expensive than other types of flooring. However, its durability and easy maintenance make it a good investment for many homeowners and businesses, and the initial cost is often offset by the long-term savings.

Knowing about the chemical makeup and formula of epoxy resin floor coatings is important for those who are interested in this type of flooring. This type of coating is known for its durability and easy maintenance, and it can be a great investment for any home or business.

Understanding the installation process and the cost of epoxy flooring can help you make the best decision for your needs. Always consult a professional contractor to ensure that the job is done correctly. Even with a professional installation you may find that their are issues like thickness, uneven-ness, and peeling; if you do encounter any of these issues don’t worry we have you covered.

Thickness


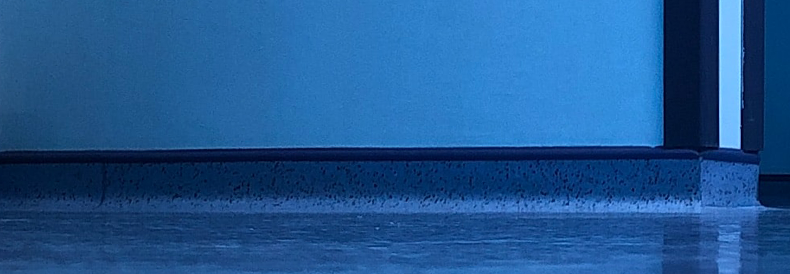
Many people don't realize that there are different epoxy flooring thickness levels. The thickness level you need depends on the type of epoxy and the purpose of the floor. In this article, we'll show you how to determine which epoxy flooring thickness level is right for your needs.

What Types of Epoxy Flooring Are There?

There are three main types of epoxy: water-based, solvent-based, and 100% solid. Water-based epoxy is the most common type used for residential and commercial applications. It's less expensive than other types of epoxy, and it's easy to apply.

Solvent-based epoxy is more expensive than water-based, but it's more durable and has a higher resistance to chemicals and staining.

100% solid epoxy is the most expensive type of epoxy, but it's also the most durable. It has a higher resistance to chemicals, staining, and UV light.

What Are the Different Epoxy Flooring Thickness Levels?

The thickness level of epoxy flooring is measured in mils (thousandths of an inch). The most common thickness levels are 2, 3, and 4 mils.

2 mils: This is the thinnest layer of epoxy, and it's typically used for residential applications.

3 mils: This is the standard thickness for commercial and industrial applications.

4 mils: This is the thickest layer of epoxy, and it's typically used for industrial applications where there's a lot of foot traffic or heavy equipment.

How Do I Know Which Epoxy Flooring Thickness Level I Need?

The type of epoxy and the floor's intended use are the two main factors that determine which thickness level you need.

If you're using water-based epoxy for a residential application, 2 mils are typically sufficient. For commercial and industrial applications, 3 mils are the standard thickness. And for floors that will see a lot of foot traffic or heavy equipment, 4 mils is recommended.

Keep in mind that the thicker the layer of epoxy, the more expensive it will be. So, if you're on a tight budget, you may want to opt for a thinner layer of epoxy.

When It Comes to Epoxy Flooring, Thickness Matters

The thickness of your epoxy flooring is an important factor to consider when choosing the right floor for your needs. Water-based epoxy is the most common type used for residential and commercial applications, and it comes in different thickness levels.

The type of epoxy and the floor's intended use are the two main factors that determine which thickness level you need. So, be sure to keep these things in mind when selecting the right epoxy flooring for your home or business.

You should also consult with a professional flooring contractor to get expert advice on which epoxy flooring thickness level is right for your project. They can help you choose the right epoxy and thickness level based on your specific needs.

What if I Install Epoxy Flooring that's Too Thick or Thin?

If you install epoxy flooring that's too thick, it may not cure properly. This can cause the floor to become sticky or tacky, and it may not be as durable as a properly cured floor.

If you install epoxy flooring that's too thin, it may not provide the desired level of protection or durability. So, be sure to select the right thickness for your needs.

Installing epoxy flooring is a big investment, so be sure to consult with a professional before starting your project. They can help you choose the right epoxy and thickness level based on your specific needs. With their help, you can ensure that your epoxy flooring is installed correctly and that it will last for many years to come.

What Are the Risks of DIY Epoxy Flooring Installation?

Installing epoxy flooring is a big investment, and it's important to do it right. If you don't have experience installing epoxy floors, it's best to leave it to the professionals.

There are a few risks associated with DIY epoxy flooring installation, including:

- Applying the epoxy too thick or too thin

- Not allowing the epoxy to cure properly

- Damaging the floor during installation

These risks can be avoided by hiring a professional flooring contractor to install your epoxy floor. They have the experience and expertise to ensure that your floor is installed correctly and that it will last for many years to come.

On average, the costs to fix DIY epoxy mistakes can range from $500 to $1,500. So, it's best to avoid these mistakes by hiring a professional to install your epoxy floor.

Sealing


Are you unsure whether you should fix an uneven epoxy coating? This is an issue that many people face, but most shy away from because they don't want to make things worse. Luckily, we're here to help! Keep reading to learn more about repairing an uneven epoxy coating.

Why Do Epoxy Coatings Become Uneven?

There are several reasons why an epoxy coating might become uneven. The most common reason is improper mixing of the two components. If the resin and hardener are not mixed together correctly, the resulting mixture will be uneven and will not set properly. Another common reason for an uneven epoxy coating is improper application. If the epoxy coating is not applied evenly, it will dry unevenly and will be more likely to crack or chip.

Should I Fix an Uneven Epoxy Coating?

The answer to this question depends on the severity of the unevenness. If the unevenness is minor, you may be able to get away with simply sanding down the high spots and re-coating the surface. However, if the unevenness is more severe, you will likely need to remove the entire epoxy coating and start from scratch.

How Can I Prevent My Epoxy Coating from Becoming Uneven?

There are a few things you can do to prevent your epoxy coating from becoming uneven. First, make sure that you mix the resin and hardener together correctly. Be sure to follow the manufacturer's instructions carefully. Second, apply the epoxy coating evenly. Use a paint roller or a brush to apply an even layer of the mixture. Lastly, allow the epoxy coating to dry completely before walking on it or putting any weight on it.

By following these tips, you can avoid having to repair an uneven epoxy coating. However, if your epoxy coating does become uneven, don't hesitate to contact a professional for help.

What if My Epoxy Coating Can't be Repaired?

If your epoxy coating is severely damaged or if it cannot be repaired, you may need to replace it. The best way to do this is to hire a professional who has experience with epoxy coatings. They will be able to remove the old coating and apply a new one quickly and efficiently.

Replacing an epoxy coating can be a daunting task, but it's important to remember that it's not impossible. With the help of a professional, you can have a new epoxy coating that looks as good as new in no time!
Best Practices for Repairing an Uneven Epoxy Coating

Now that you know more about repairing an uneven epoxy coating, it's time to put that knowledge into practice! Here are a few best practices to keep in mind.

First, you should always consult with a professional before attempting to repair an uneven epoxy coating. They will be able to assess the damage and give you specific instructions on how to proceed.

Next, if you decide to repair the coating yourself, be sure to follow the manufacturer's instructions carefully. This will ensure that you mix the resin and hardener correctly and that you apply the epoxy evenly.

Finally, remember to allow the epoxy coating to dry completely before walking on it or putting any weight on it. This will help prevent further damage to the coating.

By following these best practices, you can avoid making a bad situation worse. If you're ever unsure about how to proceed, always err on the side of caution and consult with a professional.

An uneven epoxy coating can be a major annoyance. However, it's important to remember that it's not the end of the world. With a little bit of knowledge and the help of a professional, you can easily repair an uneven epoxy coating. Just be sure to follow the manufacturer's instructions carefully and to allow the epoxy plenty of time to dry before using it.

Over the years we here at epoxy flooring anaheim have gotten hundreds of questions about epoxy flooring and all of its elements, here are a couple of popular questions that we get.

Q: Can an uneven epoxy coating be repaired?
A: Yes, an uneven epoxy coating can usually be repaired. However, the severity of the damage will determine how easy it is to repair.

Q: What if my floor is very uneven?
A: If your floor is very uneven, you may need to replace the entire epoxy coating. While this is common, it's important to consult with a professional before attempting to do this yourself.

Q: How can I prevent my epoxy coating from becoming uneven?
A: There are a few things you can do to prevent your epoxy coating from becoming uneven. First, make sure that you mix the resin and hardener together correctly. Be sure to follow the manufacturer's instructions carefully. Second, apply the epoxy coating evenly. Use a paint roller or a brush to apply an even layer of the mixture. Lastly, allow the epoxy coating to dry completely before walking on it or putting any weight on it.

Alongside thickness and un-even coatings many people notice that (if poorly installed) the epoxy flooring will begin to peel. This may start small but it can become a big issue very quickly.

Peeling


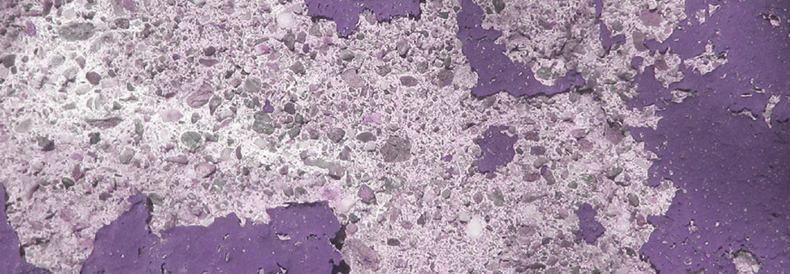
How does epoxy flooring peel over time? There are several conditions that may cause the epoxy to peel over time. In this article, we'll look at some of the most common reasons and solutions. We'll also discuss acid etching and profiling. You'll want to follow these steps to avoid this problem. In the end, you'll have a beautiful floor that lasts for many years!

Conditions that Cause Epoxy Flooring to Peel

In general, conditions that cause epoxy flooring to peel over time are not related to the coating itself. These problems can be caused by improper preparation, which can result in bubbles and blisters. There are several factors to consider before applying an epoxy floor. Proper preparation is crucial to a long-lasting finish, so it's best to use a professional.

A qualified epoxy floor applicator will first assess the subsurface conditions, mix the correct resin and hardener ratio, and ensure proper air entrainment. In addition, unqualified individuals are less likely to apply the coating properly.

One of the reasons why epoxy coatings peel is due to poor preparation. The surface must be clean and porous to adhere to the coating properly. If it's not, the epoxy coating will just peel away with the concrete. Poor quality concrete slabs may be the cause of peeling epoxy. Poorly-mixed concrete, improper curing, or poor workmanship could all contribute to this problem.

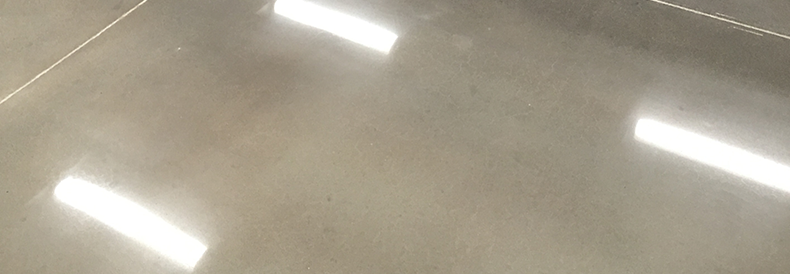
Besides being easy to install, epoxy flooring is extremely durable. The chemical compounds in it create a floor that resists shock and heat while also being aesthetically pleasing. In addition, the product can be coated with an anti-slip coating to prevent slipping and falls. Epoxy flooring is an excellent solution for companies in a range of industries, including meat and poultry, electronics, and pharmaceutical.

Acid Etching

Several factors contribute to the peeling and cracking of epoxy flooring. The first is moisture. If water is allowed to sit on the surface of the concrete slab, the epoxy will not adhere to the surface. Another factor is improper floor neutralization. Fortunately, there are several solutions to the problem.

Acid etching can cause your flooring to peel over time, so use the right product to get a smooth surface. To prevent etching, you need to use a cleaner that contains a mild acid. Make sure to use a neutralizing solution for spills or stains. If you do get any acid on your floors, neutralizing them with a neutralizing solution is crucial.

Another cause of epoxy peeling is improper floor preparation. If you do not prepare the concrete floor properly, the epoxy will not adhere to it. In addition to being too dirty, the concrete floor may have been acid etched and cannot be properly prepared. This may have also caused loose concrete dust to sit on top of the floor. These two conditions can prevent the epoxy from properly bonding with the concrete. As a result, the epoxy will peel off soon after applying it.

Profiling

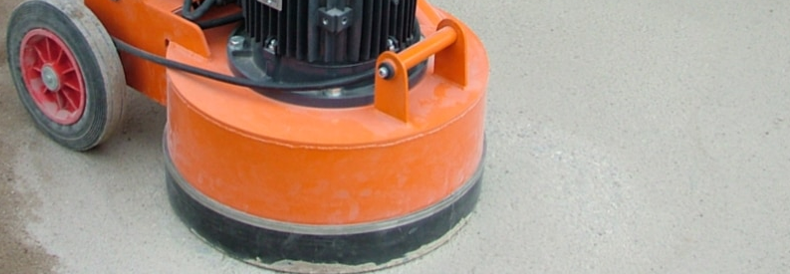
The process of profiling your epoxy flooring requires a certain level of expertise, a skill that is best acquired by a professional. The most important aspect of this process is proper concrete preparation. Poorly prepared concrete is one of the major reasons why epoxy floors fail. Acid etching is the process of opening the concrete pores to create a rougher surface. This type of surface profile is essential for coatings that are thicker than paint.

For a proper epoxy coating, the concrete surface must be roughened so that the coating will adhere properly. This process is often done with chemical or mechanical means. By profiling the surface of the concrete, you ensure that the coating will have something to "bite" onto. In addition to profiling, you must thoroughly clean your concrete to ensure that it is completely clean of contaminants. The coating will adhere to the surface better if the surface is clean and dry.

Temperature

If you are considering installing epoxy flooring on your garage floor, you should know that the chemical reaction of the floor's surface is affected by temperature. As the temperature of concrete decreases over time, the epoxy becomes weak and peels. Nevertheless, you can use rubber mats to protect your floor in case it peels over time. In adhesion tests, high temperatures will cause the floor to lift, but low temperatures won't.

In addition to humidity, the temperature can affect the curing process of your epoxy flooring. When you install your flooring, the temperature of the surrounding environment must be at a suitable level. Cold temperatures will cause your flooring to crack and peel, and the process may take longer. Ensure the floor's temperature remains around 77 degrees Fahrenheit throughout the installation process. If you install the flooring in an area with high humidity, it will take longer to cure.

A poorly prepared concrete surface is another cause for an epoxy floor to peel. The surface profile is important because it determines the mechanical bond between the epoxy and the concrete. Most epoxy has a CSP 1 or CSP 2 profile, and improper surface preparation will result in a peeling surface. Therefore, you must prepare your concrete surface properly. However, if you have a poorly prepared floor, you may have to use acid etching or grinding to get the right surface profile.

Cleaning

Scrubbing an epoxy floor is necessary if it starts to peel over time. Grit and sand are hard to detect, but they can damage the coating over time. To remove dirt and debris, use a soft-bristled brush. Avoid using steel wool or harsh chemicals. It is also important to avoid using vinegar or acid, as these can break down the epoxy catalyst. If the surface is damaged by rust, it is important to follow the instructions listed above to prevent further damage to the epoxy flooring.

Soap-based cleaners leave behind soap scum. These substances dull the gloss of the epoxy coating and can damage the anti-skid properties of the floor. Also, they are dangerously slippery when wet, and every garage floor will get wet from time to time. Using a neutralizing agent is highly recommended. To clean your flooring, use one-third cup of dishwashing soap diluted in four or five liters of water.

Another way to check whether your epoxy is peeling is to use a water-drop test. If a water drop falls onto the area, it will absorb the water and leave the area darker than the surrounding concrete. If the oil-stained area absorbs water, the epoxy will start to peel. In some cases, oil can also damage the surface of the floor. The solution to this problem depends on the type of oil and its location.

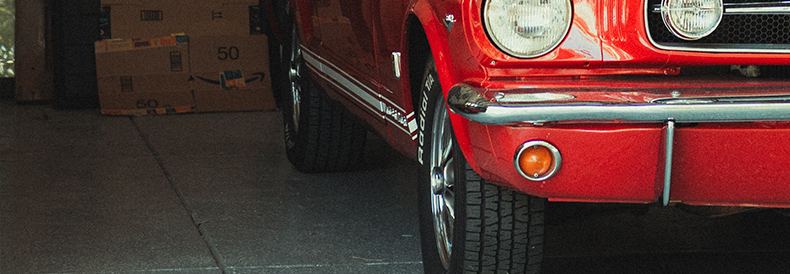
Once you know how epoxy can degrade and peel over time, you can take the steps to prevent this damage from happening. There is no reason to live with dull or cracked epoxy floors. One of the most common places that the listed issues occur is in the Garage. In our opinion there is no better flooring option for the garage!

Why is Epoxy Great for Garage Floors?

There are many reasons why epoxy is a great choice for garage floors. First, it is very durable and can withstand a lot of wear and tear. Epoxy is also resistant to oil and chemicals, making it ideal for use in garages. Epoxy floors are also easy to clean and maintain, and they can give your space a high-end look. It is much cheaper than other flooring options, such as tile or stone, and is available in a variety of colors to give you a custom design. Overall, epoxy is a great choice for those looking for a durable and easy-to-maintain floor for their garage.

How to Fix Damaged Garage Epoxy Floors

There are many different types of repairs you can make to your garage epoxy floor. The first step is to identify the type of damage you have. Whether you have small cracks or chips, or large sections that need to be replaced, there are repair methods that can be used to fix your floor.

Repairing Small Cracks and Chips

For small cracks and chips, you can use a repair kit that is specifically designed for epoxy floors. These kits come with everything you need to fix your floor, including the epoxy, primer, and putty knife. Simply mix the epoxy according to the instructions and use the putty knife to fill in the cracks or chips. Once the epoxy has dried, you can sand it down and apply a new coat of epoxy to your floor.

Replacing Large Sections

For large sections that need to be replaced, you will need to remove the old epoxy and apply a new layer. First, use a power washer or stripper to remove the old epoxy. Next, apply a new layer of primer and then epoxy. You can either roll on the epoxy or use a sprayer. Once the epoxy has dried, you can sand it down and apply a new coat of epoxy to your floor.

Upgrading Your Garage Epoxy Floor

Once you have repaired any damage to your floor, you may want to upgrade the look of your space with a new coat of epoxy. Epoxy comes in a variety of colors, so you can choose a color that matches your style. You can also add a variety of design elements to your floor, such as chips or flakes. Upgrading your garage floor with epoxy is a great way to give your space a fresh, new look. Here are some ideas to upgrade your epoxy flooring.

Add a New Color: If you are looking for a new look, you can add a new color to your floor. Epoxy comes in a variety of colors, so you can find the perfect shade to match your style. You can also use epoxy to create custom designs on your floor. Epoxy gives off a high-gloss finish that can brighten up your space.

Add Chips or Flakes: You can also add chips or flakes to your epoxy floor for a unique look. Chips and flakes come in a variety of colors and sizes, so you can create a custom design. You can apply the chips or flakes to the entire floor and give your garage a showroom feel that will make your garage look amazing.

Add a Clear Coat: If you want to protect your floor and make it last longer, you can add a clear coat of epoxy. This will create a barrier that will protect your floor from stains and wear and tear. It is also easy to clean and maintain. A clear coat is a perfect way to upgrade your floor, so it lasts longer.

Garage epoxy floors, and epoxy flooring in general is a great choice for those looking for a durable and easy-to-maintain floor. If you have any further questions, comments, or concerns we would encourage you to give us a call!

Epoxy Flooring Anaheim: Before The Coatings

All homes (with the exception of stilt homes) have some form of concrete at the foundation of the house, right beneath the existing flooring in many cases! In our world concrete is the foundation of epoxy coatings you cannot have one without the other!

In this article we will go into some concrete basics and how they relate to our process in the installation steps of concrete sealers and epoxy flooring. One of the places where concrete condition matters the most is in the garage.

Garage Concrete


With all of the vehicles that we own, it's no wonder that our garage floors can become stained and damaged. You may not think about it often, but your garage floor is constantly being exposed to oil, grease, gasoline, and other fluids. Over time, these fluids will build up on the floor and cause stains. If you're not careful, these stains can permanently damage your floor.
Fortunately, there are a few things that you can do to remove stains from oil and other fluids. With a little elbow grease and the right products, you can get your garage floor looking new again.

What Causes Oil Stains?

Oil stains are caused by fluids that contain petroleum or other oils. These fluids can come from your car, your lawn mower, or even your bicycle chain. When these fluids come into contact with your floor, they will start to break down the surface. Over time, this will cause stains and damage to your floor.

How to Remove Oil Stains

There are a few different ways that you can remove oil stains from your garage floor. The best approach will depend on the severity of the stain and the type of floor that you have.

For cement floors, you can use a degreaser or detergent to break down the oil. You can also try scrubbing the stain with a stiff brush. If the stain is still visible, you can apply a poultice to draw the oil out of the concrete.

For tile floors, you can use a cleaner that contains vinegar or lemon juice. You can also try scrubbing the stain with a toothbrush or using a poultice.

For epoxy floors, you should start by scrubbing the stain with a stiff brush. If the stain is still visible, you can apply a cleaner that contains vinegar or lemon juice. You may also need to sand the area to remove any residual stains.

Follow These Six Tips to Prevent Oil Stains

1. Use a drip pan: Place a drip pan under your car when you're changing the oil. This will catch any oil that drips from the car and prevent it from reaching your floor.

2. Wipe up spills immediately: If you spill oil or other fluids on your floor, wipe them up as soon as possible. The longer they sit, the more time they have to damage your floor.

3. Clean your tools: When you're finished using your lawn mower or other tools, make sure to clean them off before putting them away. This will remove any oil or grease that could potentially stain your floor.

4. Keep your car clean: Regularly wash and wax your car to prevent oil and other fluids from dripping onto your floor.

5. Use floor mats: Place mats under your car to catch any oil or fluids that may drip from the car.

6. Seal your floor: Sealing your floor will create a barrier between the concrete and any oil or fluids that may come into contact with it. This will make it easier to clean up any spills and prevent stains from forming.
By following these tips, you can keep your garage floor looking new. If you do get an oil stain, don't panic. With a little elbow grease and the right products, you can remove it and get your floor back to normal and allow your concrete contractor to apply a coating with little to no additional work.

Don't Overlook the Importance of Professional Help

If you have a serious oil stain that you can't remove, it's important to seek professional help. A professional can assess the situation and determine the best course of action. They may need to sand down the floor or apply a chemical treatment to remove the stain.

Grinding


Arguably the most important step in the process of epoxy coating installations is the concrete prep, which conveniently includes grinding (which may solve your oil stain problem) If you choose to grind your own concrete the process can be quite costly but it is possible.

Concrete grinding is the process of using an abrasive to wear down the top surface of the concrete. This can be done for a number of reasons, such as increasing the traction of a floor or simply making it look better. The process usually starts with a coarse grit abrasive that gradually wears down the surface. Once the desired level of wear has been achieved, a fine grit abrasive is used to smooth out the surface.

The grinding process can be done by hand or with a machine, but it is important to use the right type of abrasive for the job. If you are using a machine, you will also need to select the right attachment. The wrong type of abrasive or attachment can damage your concrete surface.

Why Do I Need To Clean My Concrete After Grinding?

Once you have ground your concrete surface, it is important to clean it. This will remove any residual dust or debris that could potentially mar the surface of your concrete. You can use a variety of methods to clean your concrete, but people are often unaware of these methods or don't think they're necessary.

Cleaning your concrete after grinding is important for a number of reasons:

-To remove any residual dust or debris that could potentially mar the surface of your concrete.

-To prepare the surface for sealant or other treatments.

-To ensure that the surface is ready for use.

How Do I Clean My Concrete After Grinding?

There are several ways to clean your concrete after grinding. The method you choose will depend on the type of concrete you have, the amount of residue that needs to be removed, and your personal preference.

Some common methods of cleaning concrete include:

-Sweeping: This is the most basic cleaning method and can be used for light cleaning jobs. A broom can be used to sweep away any residual dust or debris.

-Mopping: Mopping is a good option for cleaning concrete that is too large or difficult to sweep. A mop can also be used to reach tight spaces and corners.

-Pressure washing: Pressure washing is a more powerful cleaning method that can be used to remove stubborn dirt and debris. Pressure washing is not recommended for all types of concrete, so be sure to check with a professional before using this method.

-Vacuuming: Vacuuming is a good option for removing light debris from your concrete surface. A vacuum can also be used to reach tight spaces and corners.

Once you have chosen a cleaning method, you will need to gather the necessary supplies. You will need a broom or mop and a bucket of clean water for sweeping and mopping. You will need a pressure washer and the appropriate detergent for pressure washing. For vacuuming, you will need a vacuum cleaner and the appropriate attachments.

Once you have gathered your supplies, you can begin cleaning your concrete surface. Start by sweeping or mopping the area to remove any loose debris. Next, use your chosen cleaning method to remove any stubborn dirt or residue. Be sure to rinse the area well after cleaning. Finally, allow the surface to dry completely before using it again.

The Risks of Not Cleaning Your Concrete After Grinding

You risk damaging the surface if you do not clean your concrete after grinding. The abrasives used in the grinding process can cause etching, leaving permanent marks on your concrete's surface. In addition, any dirt or debris that is left behind can mar the surface of your concrete and make it more difficult to clean in the future.

After grinding, cleaning your concrete is important to protect your investment and keep your concrete looking its best. Be sure to choose the right cleaning method for your type of concrete, and be sure to rinse the area well after cleaning. Allowing the surface to dry completely before using it again will help to prevent any further damage.

Professional Concrete Cleaning vs. Do-It-Yourself

While it is possible to clean your concrete yourself, it is often best to hire a professional. Professional concrete cleaners have the experience and equipment needed to clean your concrete properly. In addition, they can also provide sealant and other treatments to protect your concrete from future damage.

Hiring a professional to clean your concrete is often the best option, but it is important to choose a reputable company. Be sure to read reviews and compare prices before hiring a professional.

When hiring a professional, be sure to ask about their cleaning methods and what type of equipment they use. You should also ask about any warranties or guarantees that are offered.

Getting your concrete professionally cleaned is the best way to protect your investment and keep your concrete looking its best. Be sure to choose a reputable company and ask about their cleaning methods and equipment. Choose a company that offers a warranty or guarantee for their work, and be sure to read reviews before hiring a contractor.

From oil stain removal to grinding it is all just setup for the application of a concrete sealer or decorative concrete coating.

Sealing


Is your concrete floor starting to show wear and tear? You may be thinking about getting a floor coating sealer. A floor coating sealer is a great way to protect your investment and make your floors look shiny and new again.

There are many different types of floor coating sealers on the market, so how do you know which one is right for you? This article will discuss everything you need to know about floor coatings and sealers, including what they are, the different types available, and how to choose the best one for your needs.

What is a Floor Coating Sealer?

A floor coating sealer is a material applied to concrete floors to protect them from wear and tear. It acts as a barrier between the floor and dirt, spills, and other debris. There are many different types of floor coating sealers available on the market, each with its own set of benefits.

The most common type of floor coating sealer is acrylic. Acrylic floor coating sealers are durable and easy to apply. They provide a high-gloss finish that is resistant to scuffs and stains. However, acrylics can yellow over time and may need to be reapplied more often than other types of sealers.

Polyurethane floor coating sealers are another popular option. They are more durable than acrylics and provide a semi-gloss finish. Polyurethanes are also resistant to yellowing, but they can be more difficult to apply than acrylics.

Epoxy floor coating sealers are the most durable option. They provide a high-gloss finish that is resistant to scuffs, stains, and yellowing. Epoxies can be difficult to apply, so they are best left to professionals.

How to Choose the Best Floor Coating Sealer for Your Needs

When choosing a floor coating sealer, you should keep a few things in mind. First, consider the type of traffic your floor will see. If you have a high-traffic area, you will need a more durable sealer. Second, think about the look you want to achieve. An epoxy sealer is your best bet if you want a high-gloss finish. If you prefer a semi-gloss finish, go with a polyurethane sealer. And if you want an easy-to-apply sealer with a glossy finish, choose an acrylic sealer.

Finally, consider your budget. Acrylics are the most affordable option, followed by polyurethanes and epoxies.

When it comes to floor coating sealers, there is no one-size-fits-all solution. The best way to choose the right sealer for your needs is to consult with a professional. They will be able to assess your situation and recommend the best type of sealer for your specific needs.

DIY vs. Professional Floor Sealant Installation

Installing a floor coating sealer is not a DIY project. If you want it done right, you should hire a professional. They will have the experience and knowledge necessary to ensure that your floors are properly protected.

A professional will also be able to apply the sealer evenly and without streaks. They will also be able to choose the right type of sealer for your needs and budget.

Hiring a professional to install your floor coating sealer is an investment, but it will pay off in the long run. Your floors will be properly protected and look great for years to come.

If you're looking for a floor coating sealer, consult with a professional today. They will be able to help you choose the best option for your needs.

How Do I Know if a Floor Coating Sealer is Right for Me?

If you're not sure if a floor coating sealer is right for you, there are a few things you can do. First, take a look at your floors. Are they in good condition? If so, a sealer may not be necessary. However, if your floors are starting to show signs of wear and tear, a sealer can help protect them from further damage.

Second, consider the type of traffic your floors will see. If you have a high-traffic area, a sealer can help prolong the life of your floors. Third, think about the look you want to achieve. An epoxy sealer is your best bet if you want a high-gloss finish. If you prefer a semi-gloss finish, go with a polyurethane sealer. And if you want an easy-to-apply sealer with a glossy finish, choose an acrylic sealer.

Finally, consult with a professional. They will be able to assess your needs and recommend the best type of sealer for your specific situation. Below we have included the most common questions that we get about concrete sealing. If you have other questions that are not listed we are available to take your call!

Q: What is a floor coating sealer?
A: A floor coating sealer is a clear or tinted liquid that is applied to concrete, stone, tile, and other types of floors. It creates a barrier that protects the floors from stains, dirt, and other debris.

Q: How much does a floor coating sealer cost?
A: The cost of a floor coating sealer depends on the type of sealer, the size of the area, and the number of coats. You can expect to pay between $0.50 and $1.00 per square foot for a basic acrylic sealer. For a more durable epoxy sealer, you can expect to pay between $1.50 and $2.00 per square foot.

Q: How long does a floor coating sealer last?
A: The lifespan of a floor coating sealer depends on the type of sealer and the amount of traffic your floors receive. A basic acrylic sealer can last for up to three years with light traffic. A more durable epoxy sealer can last for up to seven years with regular traffic.

Q: Do I need to hire a professional to install my floor coating sealer?
A: While you can technically install a floor coating sealer on your own, we recommend hiring a professional. They will have the experience and knowledge necessary to ensure that your floors are properly protected. Plus, they will be able to apply the sealer evenly and without streaks.

Q: How often do I need to reapply my floor coating sealer?
A: The frequency of reapplication depends on the type of sealer and the amount of traffic your floors receive. A basic acrylic sealer may need to be reapplied every three years with light traffic.

Epoxy 101

In this article we will take you through the basics of epoxy flooring, applications and areas, misconceptions, benefits, design ideas, and a DIY best practice guideline.

What is Epoxy Made Of?

Unlike traditional flooring where you may have rubbers, textiles, or wood epoxy flooring is made of a two part system of chemicals that when combined harden. Simply stated it is a composite material composed of two primary components: resin and hardener. The resin portion acts as the binder for the coating, while the hardener chemically reacts with the resin to form a strong bond that helps prevent cracking and peeling over time.

The materials used to make epoxy flooring are typically very strong, making the finished product ideal for high-traffic areas with a lot of wear and tear. This type of flooring is often used in commercial settings such as retail stores, restaurants, and office buildings. In addition to its durability, epoxy flooring is also easy to clean and maintain, which helps keep businesses looking their best.

Where is Epoxy Used?

One of the most common applications for epoxy flooring is a garage floor coating. A garage often sees spills, leaks, and stains, making it difficult to keep clean and look its best. Epoxy flooring can help protect your garage from wear and damage while also providing an attractive, glossy finish that will brighten up any workspace.

In addition to garages, epoxy flooring is also used in basements, laundry rooms, kitchens, workshops, and other high-traffic areas around the home. Its durability makes it ideal for these spaces where regular cleaning and maintenance are essential. As an added bonus, epoxy floors can easily be customized with decorative designs or patterns using stencils or paint, helping you create a truly unique space.

There are dozens of additives for epoxy floor coatings that make epoxy a truely flexible flooring option for all sorts of applications!

What is an Epoxy Additive?

An epoxy additive is a material that is added to the epoxy resin in order to change its properties. There are a variety of epoxy additives on the market, each with its own unique purpose. For our purposes, we're interested in epoxy additives that will make the flooring non-slip.

Types of Non-Slip Additives for Epoxy Floors

There are several different types of non-slip additives that can be used in epoxy flooring. The most common type is silica sand. Silica sand is a very fine type of sand that can be scattered across the floor before the epoxy coating is applied. As the epoxy dries, the silica sand will become embedded in the coating and will provide a sandpaper-like surface that will increase the coefficient of friction.

Another type of non-slip additive is aggregate. Aggregate is a material that is added to the epoxy resin before it is applied to the floor. Common types of aggregate include aluminum oxide, silicon carbide, and quartz. These materials are very hard and will provide a rough surface that will increase the coefficient of friction.

A third type of non-slip additive is a polymer. Polymers are long chain molecules that can be added to the epoxy resin in order to change its properties. There are a variety of polymers that can be used, but the most common type is polyurethane. Polyurethane is a plastic that is frequently used in coatings and adhesives. It is very flexible and has a high coefficient of friction.

How to Add a Non-Slip Additive to Epoxy Flooring

There are two ways to add a non-slip additive to epoxy flooring. The first way is to mix the additive into the epoxy resin before it is applied to the floor. This can be done by adding the additive directly to the epoxy bucket or by using a mixing paddle. The second way is to sprinkle the additive onto the floor before the epoxy is applied. This method is often used with silica sand because it can be difficult to evenly distribute the sand if it is mixed into the epoxy.

The Best Non-Slip Additive for Epoxy Flooring

The best non-slip additive for epoxy flooring is polyurethane. Polyurethane has a high coefficient of friction and is very flexible. It is also easy to add to the epoxy resin. You can simply mix it into the epoxy before you apply it to the floor.

Frequently Asked Questions About Epoxy and Non-Skid Additives

Q: How long does it take for the epoxy to dry?
A: The epoxy will take 24-48 hours to fully cure. During this time, it is important not to walk on the floor or allow any traffic.

Q: Can I use a power washer to clean my floor?
A: No. Power washing can damage the epoxy coating and potentially cause it to fail.

Q: What if I accidentally spill something on my floor?
A: If you spill something on your floor, it is important to clean it up as soon as possible. Use a mild soap and water solution to avoid damaging the coating.

Q: Can I use furniture on my floor?
A: Yes. However, it is important to use felt pads or another type of soft material under the furniture legs to avoid scratching the floor.

Q: Can I wax my floor?
A: No. Wax can damage the epoxy coating and potentially cause it to fail.

Q: How long will my floor last?
A: With proper care, your floor should last for many years. On average, epoxy flooring will last 10-15 years.

Q: Do I need to do anything to prepare my floor before I apply the epoxy?
A: Yes. It is important to clean your floor and remove any dirt, dust, or oil before you apply the epoxy. Failure to do this can result in a poor bond between the epoxy and the floor.

What are the Benefits of Installing an Epoxy Floor?

There are many benefits associated with installing epoxy flooring in your home or commercial setting. In terms of cost, epoxy floors are generally comparable to other types of flooring materials such as concrete or tiles. They are also very easy to maintain and clean, which can help save you time and money over the long term.

In addition, epoxy is resistant to stains, moisture, and chemicals, making it ideal for high-traffic areas where spills and leaks may be common. This durable material also helps prevent cracking and peeling over time, giving you peace of mind that your floor will look great for years to come. Whether you're looking for a garage upgrade or need a new floor for your kitchen or basement, epoxy may be the perfect solution for you.

Residential vs. Commercial vs. Industrial Epoxy: What are the Differences?

When it comes to epoxy flooring, there are three main types: residential, commercial, and industrial. Each type is designed for a specific setting and has its own unique benefits.

Residential epoxy is typically thinner than the other two types and is best suited for garages, basements, and laundry rooms. It is not as durable as commercial or industrial epoxy but still provides a high-quality finish that can withstand regular use.

Commercial epoxy is a thicker coating that is designed to withstand more wear and tear than residential epoxy. It is often used in retail stores, restaurants, office buildings, and other high-traffic areas where a durable flooring material is essential.

Industrial epoxy is the thickest and most durable type of epoxy flooring available. It is typically used in factories, warehouses, and other industrial settings where extreme durability is required for safety reasons.

Which Epoxy Coating is Right For My Space?

The type of epoxy coating you need will depend on the intended use for the floor. For example, a thinner residential epoxy may be sufficient for a garage or basement, while a thicker commercial or industrial epoxy may be necessary for a high-traffic retail setting.

Installing an epoxy floor is a big decision, but it can provide many benefits in terms of cost, durability, and easy maintenance. If you're considering this type of flooring for your home or business, be sure to consult with a professional to find the best option for your space.

When evaluating whether or not epoxy flooring will be right for you, you may encounter a lot of ‘myths’ or misconceptions about the concrete coating systems. Let us help set the record straight

Myth: Epoxy is challenging to apply

Applying epoxy is actually quite simple, especially if you use a water-based variety. Water-based epoxies are easier to apply and don't have the strong odor that solvent-based epoxies do.

Myth: Epoxy is only for commercial or industrial settings

Epoxy flooring has become increasingly popular in homes in recent years because of its durability and easy maintenance.

Myth: Epoxy is only available in a clear or translucent finish

Epoxy comes in many different colors, so you can choose one that best fits your needs. The most common epoxy flooring color is clear, but it can also be tinted to match the color scheme of your home or business.

Myth: Epoxy is slippery

Epoxy floors are slip-resistant, making them a safe choice for areas with a lot of foot traffic.

Myth: Epoxy is expensive

While epoxy flooring is more expensive than some other types of flooring, it is still an affordable option.

Myth: Epoxy is difficult to maintain

Epoxy floors are easy to keep clean because they are waterproof and stain-resistant.

Myth: Epoxy can only be applied to concrete

Epoxy coatings can be applied to many different types of surfaces, including concrete, wood, metal, and tile.

Myth: You need to hire a professional to install epoxy flooring

Applying epoxy is a relatively simple process, so you may not need to hire a professional. However, if you have any concerns, it is always best to consult with a flooring expert.

Myth: Epoxy is not eco-friendly

Epoxy is actually a very environmentally friendly material. It is made up of recycled materials and does not off-gas like some other types of flooring.

Myth: Epoxy is not durable

Epoxy is a very durable material that can withstand a lot of wear and tear. It is also waterproof and stain-resistant, making it easy to keep clean.

If you are looking for a durable and easy-to-maintain flooring option, epoxy may be the right choice for you. With so many different types and finishes available, there is sure to be an epoxy coating that will suit your needs.

Myth: Epoxy is Only for Commercial Spaces

Another common misconception about epoxy is that it is only for commercial spaces. While epoxy flooring is most commonly installed in commercial settings, this type of flooring can also be installed in residential settings such as garages, basements, and patios.

Myth: Epoxy Floors are Easy to Install

Many people believe that epoxy floors are easy to install. However, this is not the case. Epoxy floors must be installed by a trained and certified professional to achieve the best results.

Myth: Epoxy Floors are Only for Industrial Settings

Another common misconception about epoxy floors is that they are only for industrial settings. While epoxy flooring is most commonly installed in industrial settings, this type of flooring can also be installed in residential settings such as garages, basements, and patios.

Myth: Epoxy Floors are Dull and Boring

Many people believe that epoxy floors are dull and boring. However, this is not the case. Epoxy floors come in various colors and finishes. This gives you the ability to create an aesthetically pleasing and functional floor.

Pros and Cons of Epoxy Flooring


1. Durability
One of the biggest benefits of epoxy flooring is that it is extremely durable and can withstand heavy traffic for many years without showing signs of wear and tear.

2. Easy to Clean
Since epoxy floors are highly resistant to staining, spills do not soak into the surface or leave behind an unsightly residue like they often do with tile or carpeted surfaces. As a result, wiping up spills and dirt is quick and easy, and your floor will always look clean.

3. Resistant to Chemicals
Epoxy floors are also resistant to a variety of chemicals, making them ideal for use in settings such as auto repair shops and factories where chemicals are commonly used.

4. Increased Safety
Another advantage of epoxy floors is that they can increase safety in the workplace by reducing the risk of slips and falls. Epoxy floors are slip-resistant and can be textured to provide even more traction. In addition, epoxy floors are often installed with drainage systems to prevent standing water from accumulating on the surface.

5. Aesthetics
When it comes to epoxy flooring, the sky’s the limit in terms of design possibilities. You can really let your imagination run wild and create a space that reflects your brand’s identity. Here are some ideas to get you started:

- Use different colors of epoxy to create a custom design. You could even use multiple colors to create a gradient effect.

- Incorporate branding elements into your design. For example, you could include your company logo or tagline.

- Use glow-in-the-dark epoxy for a unique look. This is perfect for businesses that want to stand out from the crowd.

- Create an intricate design using stencils or tape. This is a great way to add interest to your space.

No matter what type of property type you have, there’s an epoxy flooring solution that will suit your needs. So don’t be afraid to get creative and really make your space your own.

What Are the Cons of Epoxy Flooring?

1. Cost
One drawback of epoxy floors is that they are often more expensive than other types of flooring, such as tile or carpeting. However, you may be able to save money by installing the floor yourself or choosing a less-expensive option such as polished concrete rather than real epoxy resin.

2. Must Be Installed Professionally
Another potential downside of epoxy flooring is that it must be installed professionally to get the best results and ensure that the surface is even and smooth with no gaps between the tiles.

If you're considering epoxy flooring for your home or business, keep these pros and cons in mind. With its many benefits, epoxy floors can be a great way to enhance the look and usability of any space. But it's important to weigh the costs against the benefits so that you can make an informed decision about whether this type of flooring is right for you.

How to Find a Reputable Epoxy Contractor


When it comes to installing epoxy flooring, it's important to hire a reputable contractor.

There are a few things to keep in mind when searching for a reputable epoxy contractor, including:

- Make sure the contractor is licensed and insured

- Ask for referrals from friends or family

- Read online reviews

- Get multiple estimates

While it may be tempting to install epoxy flooring yourself, it's best to leave it to the professionals. Hiring a reputable contractor is the best way to ensure that your floor is installed correctly and that it will last for many years.

If you're looking for a reputable epoxy contractor in your area, be sure to contact our team of dedicated epoxy experts. We are a licensed and insured flooring contractor with many years of experience installing epoxy floors. We offer free estimates, so you can get an idea of what it will cost to install an epoxy floor in your home or business. Give us a call today to learn more about our services!

Important Questions To Ask When Choosing an Epoxy Flooring Contractor


1. What experience do you have with installing epoxy floors?

2. What kind of training have you had in installing epoxy floors?

3. Do you carry insurance?

4. What type of warranty do you offer on your work?

5. How long will the installation process take?

6. How much will the project cost?

7. Can you provide a list of references?

8. Can you provide examples of previous projects?

By asking these questions, you can better understand the contractor's experience and expertise with epoxy flooring. Additionally, having this information will help you decide whether to hire this contractor for your project.

DIY Installation


You may ask… can I install the concrete coating myself? Yes! You most certainly can.

With the vast majority of us spending more time at home, many are looking for ways to update their living spaces. If you're one of those people and have decided to take on a DIY project, congrats! Applying an epoxy coating to your floor is a great way to give any room an instant facelift.

But before you get started, there are a few things you should know. Here are the best practices for DIY epoxy coating installation:

1. Choose the right product: Not all epoxy coatings are created equal. Make sure you do your research and select a product that is specifically designed for the surface you'll be covering. For example, if you're coating concrete, look for an epoxy concrete floor coating.

2. Prep the surface: This step is crucial for ensuring a successful outcome. The surface must be clean, dry, and free of any grease, oil, or dirt. Any cracks or holes should be repaired before proceeding.

3. Protect your surroundings: Cover any areas that you don't want coated with painter's tape or plastic sheeting. Also, make sure to open windows for ventilation and wear a mask to avoid inhaling fumes.

4. Mix the epoxy: Once you've read and followed the instructions on the packaging, it's time to mix the epoxy coating according to the manufacturer's recommendations. Be sure to mix thoroughly to avoid any unevenness in the final product.

5. Apply the epoxy: Using a roller or brush, apply the epoxy evenly across the surface. If you're working with a large area, you may want to consider renting a paint sprayer.

6. Let it dry: Once the epoxy has been applied, allow it to dry completely according to the manufacturer's instructions. This typically takes 24-48 hours.

7. Add a second coat: In most cases, a second coat is necessary for optimum results. Apply the second coat using the same method as the first and let it dry completely before moving on.

8. Finish up: Once the final coat has dried, you can remove any painter's tape or plastic sheeting and enjoy your new floor!

With these best practices in mind, you're well on your way to a successful DIY epoxy coating project. Just remember to take your time, be patient, and enjoy the process.

What To Do If You Have No Experience With Epoxy Flooring?

If you have no experience with epoxy flooring, there are a few things you should know before getting started. First, epoxy flooring is a great way to update any room in your home. It's also a relatively easy project to take on, even for beginners.

That said, there are a few things you should keep in mind before getting started. First, it's important to choose the right product. There are many different types of epoxy coatings on the market, so be sure to select one that is specifically designed for the surface you'll be covering. For example, if you're coating concrete, look for an epoxy concrete floor coating.

Next, prep the surface. This step is crucial for ensuring a successful outcome. The surface must be clean, dry, and free of any grease, oil, or dirt. Any cracks or holes should be repaired before proceeding.

Last, you should take the time to read any instructions or documentation that comes with the product. This will help ensure you understand the process and know what to expect.

How to Find Help if You Need It

If you need help with your epoxy coating project, there are a few resources you can turn to. First, the internet is a great place to start. There are many websites and forums that offer helpful tips and advice for DIY projects.

Another option is to contact the manufacturer of the product you're using. They should be able to provide you with helpful information or put you in touch with a local distributor or installer.

Finally, if all else fails, don't hesitate to ask a friend or family member for help. Chances are, someone you know has experience with this type of project and can offer some helpful tips and guidance.

Key Takeaways

Applying an epoxy coating is a great way to update any room in your home.

There are a few things you should keep in mind before getting started, including:

-Choose the right product

-Prep the surface

-Read any instructions or documentation that comes with the product

If you need help, there are a few resources you can turn to, including the internet, the manufacturer of the product, and friends or family members.

FAQ About Epoxy Coating Installation

Q: What is the best way to apply an epoxy coating?
A: The best way to apply an epoxy coating is to use a roller or brush. If you're working with a large area, you may want to consider renting a paint sprayer.

Q: How long does it take for the epoxy to dry?
A: Most epoxy coatings will take 24-48 hours to dry completely.

Q: Do I need to add a second coat?
A: In most cases, a second coat is necessary for optimum results. Apply the second coat using the same method as the first and let it dry completely before moving on.