All homes (with the exception of stilt homes) have some form of concrete at the foundation of the house, right beneath the existing flooring in many cases! In our world concrete is the foundation of epoxy coatings you cannot have one without the other!
In this article we will go into some concrete basics and how they relate to our process in the installation steps of concrete sealers and epoxy flooring. One of the places where concrete condition matters the most is in the garage.
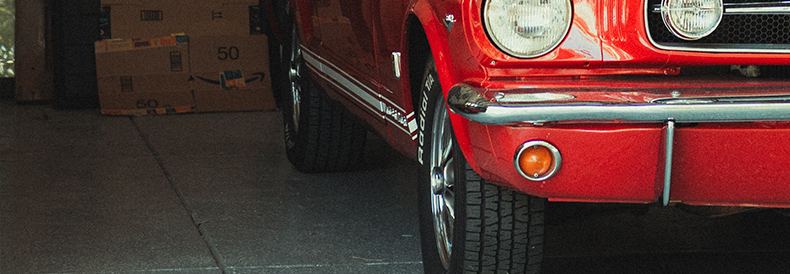
With all of the vehicles that we own, it's no wonder that our garage floors can become stained and damaged. You may not think about it often, but your garage floor is constantly being exposed to oil, grease, gasoline, and other fluids. Over time, these fluids will build up on the floor and cause stains. If you're not careful, these stains can permanently damage your floor.
Fortunately, there are a few things that you can do to remove stains from oil and other fluids. With a little elbow grease and the right products, you can get your garage floor looking new again.
Oil stains are caused by fluids that contain petroleum or other oils. These fluids can come from your car, your lawn mower, or even your bicycle chain. When these fluids come into contact with your floor, they will start to break down the surface. Over time, this will cause stains and damage to your floor.
There are a few different ways that you can remove oil stains from your garage floor. The best approach will depend on the severity of the stain and the type of floor that you have.
For cement floors, you can use a degreaser or detergent to break down the oil. You can also try scrubbing the stain with a stiff brush. If the stain is still visible, you can apply a poultice to draw the oil out of the concrete.
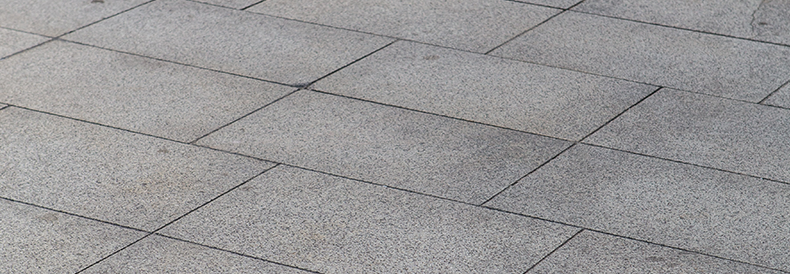
For tile floors, you can use a cleaner that contains vinegar or lemon juice. You can also try scrubbing the stain with a toothbrush or using a poultice.
For epoxy floors, you should start by scrubbing the stain with a stiff brush. If the stain is still visible, you can apply a cleaner that contains vinegar or lemon juice. You may also need to sand the area to remove any residual stains.
1. Use a drip pan: Place a drip pan under your car when you're changing the oil. This will catch any oil that drips from the car and prevent it from reaching your floor.
2. Wipe up spills immediately: If you spill oil or other fluids on your floor, wipe them up as soon as possible. The longer they sit, the more time they have to damage your floor.
3. Clean your tools: When you're finished using your lawn mower or other tools, make sure to clean them off before putting them away. This will remove any oil or grease that could potentially stain your floor.
4. Keep your car clean: Regularly wash and wax your car to prevent oil and other fluids from dripping onto your floor.
5. Use floor mats: Place mats under your car to catch any oil or fluids that may drip from the car.
6. Seal your floor: Sealing your floor will create a barrier between the concrete and any oil or fluids that may come into contact with it. This will make it easier to clean up any spills and prevent stains from forming.
By following these tips, you can keep your garage floor looking new. If you do get an oil stain, don't panic. With a little elbow grease and the right products, you can remove it and get your floor back to normal and allow your concrete contractor to apply a coating with little to no additional work.
If you have a serious oil stain that you can't remove, it's important to seek professional help. A professional can assess the situation and determine the best course of action. They may need to sand down the floor or apply a chemical treatment to remove the stain.
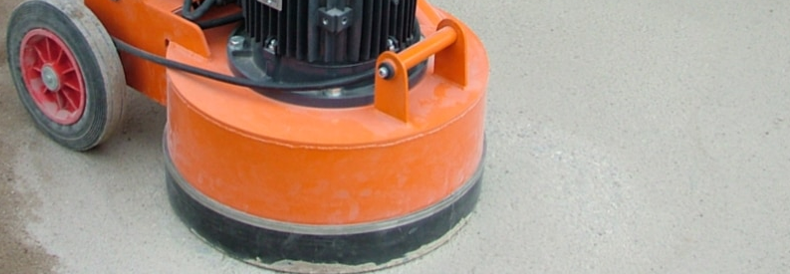
Arguably the most important step in the process of epoxy coating installations is the concrete prep, which conveniently includes grinding (which may solve your oil stain problem) If you choose to grind your own concrete the process can be quite costly but it is possible.
Concrete grinding is the process of using an abrasive to wear down the top surface of the concrete. This can be done for a number of reasons, such as increasing the traction of a floor or simply making it look better. The process usually starts with a coarse grit abrasive that gradually wears down the surface. Once the desired level of wear has been achieved, a fine grit abrasive is used to smooth out the surface.
The grinding process can be done by hand or with a machine, but it is important to use the right type of abrasive for the job. If you are using a machine, you will also need to select the right attachment. The wrong type of abrasive or attachment can damage your concrete surface.
Once you have ground your concrete surface, it is important to clean it. This will remove any residual dust or debris that could potentially mar the surface of your concrete. You can use a variety of methods to clean your concrete, but people are often unaware of these methods or don't think they're necessary.
Cleaning your concrete after grinding is important for a number of reasons:
-To remove any residual dust or debris that could potentially mar the surface of your concrete.
-To prepare the surface for sealant or other treatments.
-To ensure that the surface is ready for use.
There are several ways to clean your concrete after grinding. The method you choose will depend on the type of concrete you have, the amount of residue that needs to be removed, and your personal preference.
Some common methods of cleaning concrete include:
-Sweeping: This is the most basic cleaning method and can be used for light cleaning jobs. A broom can be used to sweep away any residual dust or debris.
-Mopping: Mopping is a good option for cleaning concrete that is too large or difficult to sweep. A mop can also be used to reach tight spaces and corners.
-Pressure washing: Pressure washing is a more powerful cleaning method that can be used to remove stubborn dirt and debris. Pressure washing is not recommended for all types of concrete, so be sure to check with a professional before using this method.
-Vacuuming: Vacuuming is a good option for removing light debris from your concrete surface. A vacuum can also be used to reach tight spaces and corners.
Once you have chosen a cleaning method, you will need to gather the necessary supplies. You will need a broom or mop and a bucket of clean water for sweeping and mopping. You will need a pressure washer and the appropriate detergent for pressure washing. For vacuuming, you will need a vacuum cleaner and the appropriate attachments.
Once you have gathered your supplies, you can begin cleaning your concrete surface. Start by sweeping or mopping the area to remove any loose debris. Next, use your chosen cleaning method to remove any stubborn dirt or residue. Be sure to rinse the area well after cleaning. Finally, allow the surface to dry completely before using it again.
You risk damaging the surface if you do not clean your concrete after grinding. The abrasives used in the grinding process can cause etching, leaving permanent marks on your concrete's surface. In addition, any dirt or debris that is left behind can mar the surface of your concrete and make it more difficult to clean in the future.
After grinding, cleaning your concrete is important to protect your investment and keep your concrete looking its best. Be sure to choose the right cleaning method for your type of concrete, and be sure to rinse the area well after cleaning. Allowing the surface to dry completely before using it again will help to prevent any further damage.
While it is possible to clean your concrete yourself, it is often best to hire a professional. Professional concrete cleaners have the experience and equipment needed to clean your concrete properly. In addition, they can also provide sealant and other treatments to protect your concrete from future damage.
Hiring a professional to clean your concrete is often the best option, but it is important to choose a reputable company. Be sure to read reviews and compare prices before hiring a professional.
When hiring a professional, be sure to ask about their cleaning methods and what type of equipment they use. You should also ask about any warranties or guarantees that are offered.
Getting your concrete professionally cleaned is the best way to protect your investment and keep your concrete looking its best. Be sure to choose a reputable company and ask about their cleaning methods and equipment. Choose a company that offers a warranty or guarantee for their work, and be sure to read reviews before hiring a contractor.
From oil stain removal to grinding it is all just setup for the application of a concrete sealer or decorative concrete coating.
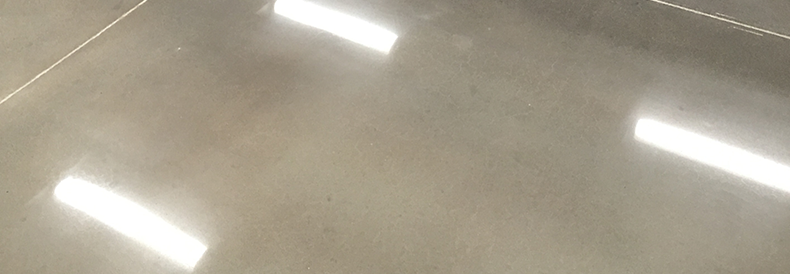
Is your concrete floor starting to show wear and tear? You may be thinking about getting a floor coating sealer. A floor coating sealer is a great way to protect your investment and make your floors look shiny and new again.
There are many different types of floor coating sealers on the market, so how do you know which one is right for you? This article will discuss everything you need to know about floor coatings and sealers, including what they are, the different types available, and how to choose the best one for your needs.
A floor coating sealer is a material applied to concrete floors to protect them from wear and tear. It acts as a barrier between the floor and dirt, spills, and other debris. There are many different types of floor coating sealers available on the market, each with its own set of benefits.
The most common type of floor coating sealer is acrylic. Acrylic floor coating sealers are durable and easy to apply. They provide a high-gloss finish that is resistant to scuffs and stains. However, acrylics can yellow over time and may need to be reapplied more often than other types of sealers.
Polyurethane floor coating sealers are another popular option. They are more durable than acrylics and provide a semi-gloss finish. Polyurethanes are also resistant to yellowing, but they can be more difficult to apply than acrylics.
Epoxy floor coating sealers are the most durable option. They provide a high-gloss finish that is resistant to scuffs, stains, and yellowing. Epoxies can be difficult to apply, so they are best left to professionals.
When choosing a floor coating sealer, you should keep a few things in mind. First, consider the type of traffic your floor will see. If you have a high-traffic area, you will need a more durable sealer. Second, think about the look you want to achieve. An epoxy sealer is your best bet if you want a high-gloss finish. If you prefer a semi-gloss finish, go with a polyurethane sealer. And if you want an easy-to-apply sealer with a glossy finish, choose an acrylic sealer.
Finally, consider your budget. Acrylics are the most affordable option, followed by polyurethanes and epoxies.
When it comes to floor coating sealers, there is no one-size-fits-all solution. The best way to choose the right sealer for your needs is to consult with a professional. They will be able to assess your situation and recommend the best type of sealer for your specific needs.
Installing a floor coating sealer is not a DIY project. If you want it done right, you should hire a professional. They will have the experience and knowledge necessary to ensure that your floors are properly protected.
A professional will also be able to apply the sealer evenly and without streaks. They will also be able to choose the right type of sealer for your needs and budget.
Hiring a professional to install your floor coating sealer is an investment, but it will pay off in the long run. Your floors will be properly protected and look great for years to come.
If you're looking for a floor coating sealer, consult with a professional today. They will be able to help you choose the best option for your needs.
If you're not sure if a floor coating sealer is right for you, there are a few things you can do. First, take a look at your floors. Are they in good condition? If so, a sealer may not be necessary. However, if your floors are starting to show signs of wear and tear, a sealer can help protect them from further damage.
Second, consider the type of traffic your floors will see. If you have a high-traffic area, a sealer can help prolong the life of your floors. Third, think about the look you want to achieve. An epoxy sealer is your best bet if you want a high-gloss finish. If you prefer a semi-gloss finish, go with a polyurethane sealer. And if you want an easy-to-apply sealer with a glossy finish, choose an acrylic sealer.
Finally, consult with a professional. They will be able to assess your needs and recommend the best type of sealer for your specific situation. Below we have included the most common questions that we get about concrete sealing. If you have other questions that are not listed we are available to take your call!
Q: What is a floor coating sealer?
A: A floor coating sealer is a clear or tinted liquid that is applied to concrete, stone, tile, and other types of floors. It creates a barrier that protects the floors from stains, dirt, and other debris.
Q: How much does a floor coating sealer cost?
A: The cost of a floor coating sealer depends on the type of sealer, the size of the area, and the number of coats. You can expect to pay between $0.50 and $1.00 per square foot for a basic acrylic sealer. For a more durable epoxy sealer, you can expect to pay between $1.50 and $2.00 per square foot.
Q: How long does a floor coating sealer last?
A: The lifespan of a floor coating sealer depends on the type of sealer and the amount of traffic your floors receive. A basic acrylic sealer can last for up to three years with light traffic. A more durable epoxy sealer can last for up to seven years with regular traffic.
Q: Do I need to hire a professional to install my floor coating sealer?
A: While you can technically install a floor coating sealer on your own, we recommend hiring a professional. They will have the experience and knowledge necessary to ensure that your floors are properly protected. Plus, they will be able to apply the sealer evenly and without streaks.
Q: How often do I need to reapply my floor coating sealer?
A: The frequency of reapplication depends on the type of sealer and the amount of traffic your floors receive. A basic acrylic sealer may need to be reapplied every three years with light traffic.
Call Us Now: 714-409-1137